How I Edit and Curate My Photos in Adobe Bridge
I like simplicity and ease. When I've just photographed something really special, I want to get to the fun part, and for me, that's enjoying the final image as a print, displayed in my home.
// Why I need a system for curating and editing personal photos
However, when I'm editing personal photos, it's easy for me to jump around. I'll have a specific photo in mind where I tried a new shooting technique, or captured a hilarious expression on my husband's face, and I want to skip around and edit the ones I remembered, but then I start forgetting which ones I've touched, and which ones I haven't.
Using Adobe Bridge to cull (narrow down & select), rate, and edit my raw photo files helps me stay focused so I can get to (my) whole point of photography: using and displaying your photos to tell a story.
// First Steps
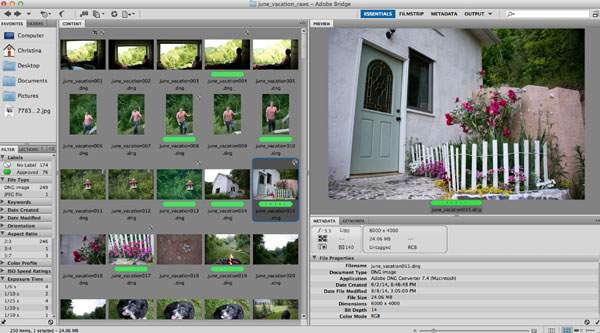
After I get my photos converted to DNG files, named, and uploaded into a designated folder on my external hard drive, I force myself to start from the top, and go through each image preview to determine if it's worth keeping or not.
To do this, I use a handy short cut to label the photos I want to keep: command key + 8 will put a green bar under the photo preview.
After I've gone through once, to label my keep photos green, I select the 'approved' label on the left so that it only shows my labeled photos and not the ones I didn't immediately decide were keepers (later I may go through the un labeled versions to see if I missed anything good).
// Starting the Editing Process
From there, I start at the top again and go through each photo to determine how much editing is needed.
For faster results, I will select a batch of images that were taken under the same lighting conditions and open them in Adobe Camera Raw:
I'll make the standard changes such as white balance or exposure correction to the first image, then click "select all" followed by "synchronize." A window will appear asking me what settings I'd like to apply from the first image to the rest of the selected images.
Once you click Ok, any adjustments you made to the first image (and allowed in the settings window that pops up), will be applied to the rest of the images you've selected.
This makes editing go by so much faster than opening each image one-by-one.
// Curating Your Photos to Tell A Story
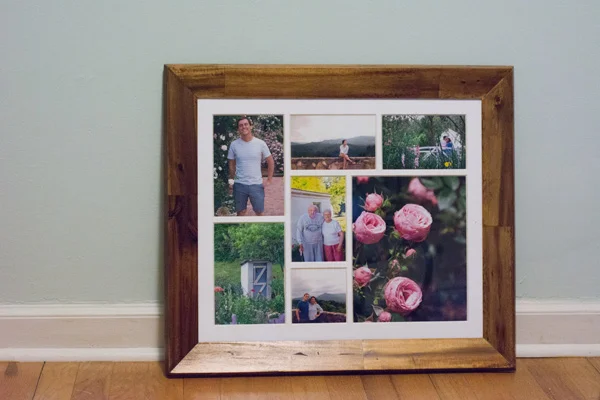
After general adjustments have been made, I go through my labeled images and pick the ones that will help tell a story. Usually I have a reason in mind. Sometimes it's for my scrapbook and I need to keep it limited because of page size requirements. Sometimes, it's for a wall art display.
// Things I consider when selecting my final images
1. orientation - depending on the project, I may need all horizontal, all vertical, or a good mix of both.
2. color - a lot of times, I pick photographs that coordinate and share a common color.
3. depth of field - a healthy mix of close ups, establishing shots, and portraits makes for good variety.
4. candid expressions - a smiling portrait is nice, but a candid photograph helps move a story.
I feel it isn't necessary to keep every single snap shot to have a meaningful, curated selection of images to remember significant events in my life. What is necessary, however, is printing those images and displaying them in the real world, rather than keeping them locked away on a device.
// Questions
1. Do you have an established workflow for selecting which photos you'll edit and print?
2. What deciding factors determine whether or not you will print and display a photograph?


